
Setup guides
Sender setup guide
For farmers and field workers: set up with a QR or manually, enter photo report details, send email, and check an uncertain submission.
Available on the App Store. The iPhone app interface is Japanese.
Daily reporting means taking photos, checking the recipient and contents, and sending. First set your name, destination, and email service connection. You can import a QR from the receiving company or enter the settings yourself.
1. Prepare what you need
Install the iPhone app from the App Store. Email requires your sender name, recipient email, and an administrator-issued service URL and connection code. Set up with a QR or manually. Contact support@photoreportcamera.com for access.
2-A. With a QR: import it from settings
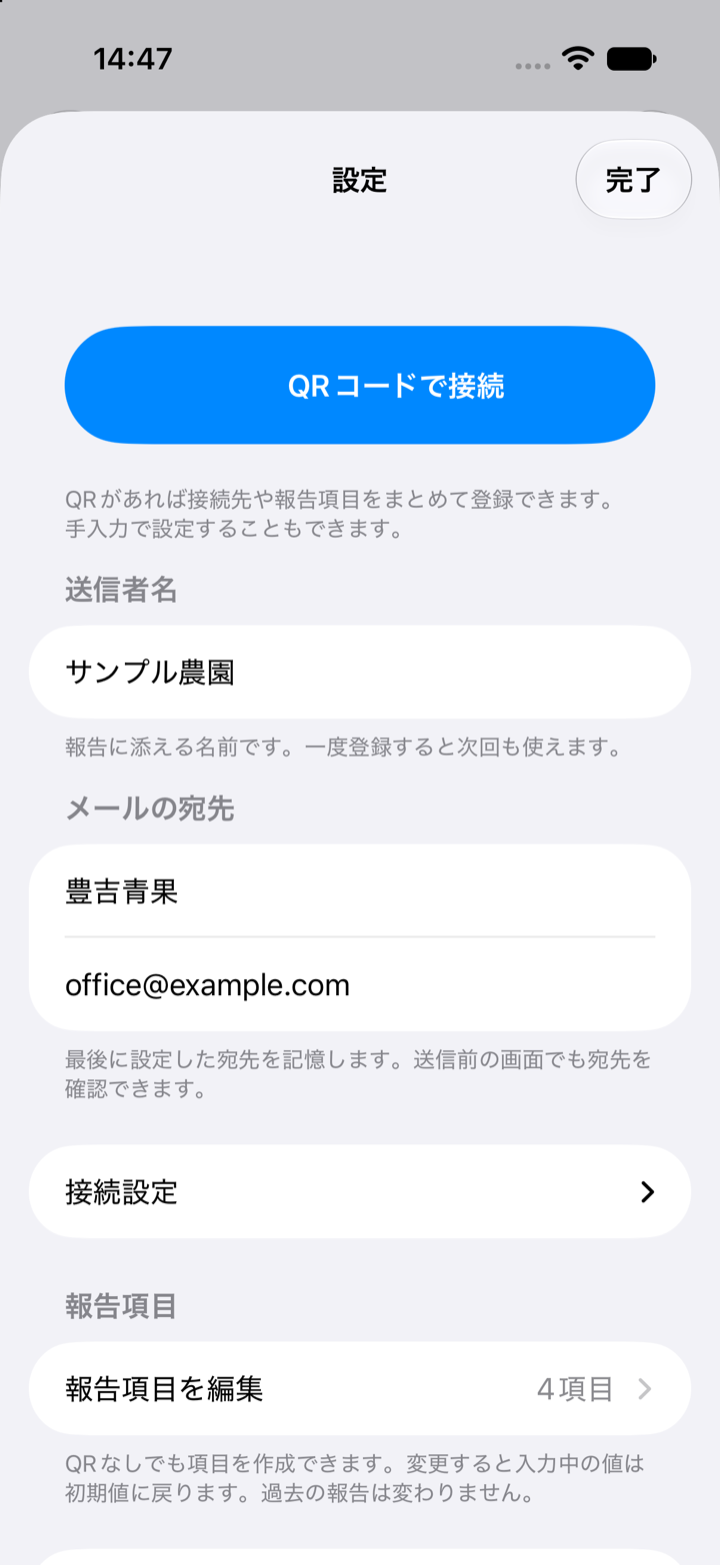
Choose “QRコードで接続” in app settings and scan the QR supplied by the receiving company. Camera access is required. Check the sender name, recipient, and extra report fields after import. A common QR without a name keeps the name already saved on your device. If none is saved, enter your farm or worker name once.
2-B. Without a QR: enter name, recipient, and connection
In settings, enter the sender name and email recipient. A recipient label is optional; the actual email address is required. Open connection settings and enter the email service URL and connection code supplied by the administrator. Creating recipients or report fields is separate from obtaining permission to send email. Do not invent a code or substitute an ordinary website URL.
3. Create or change report fields when needed
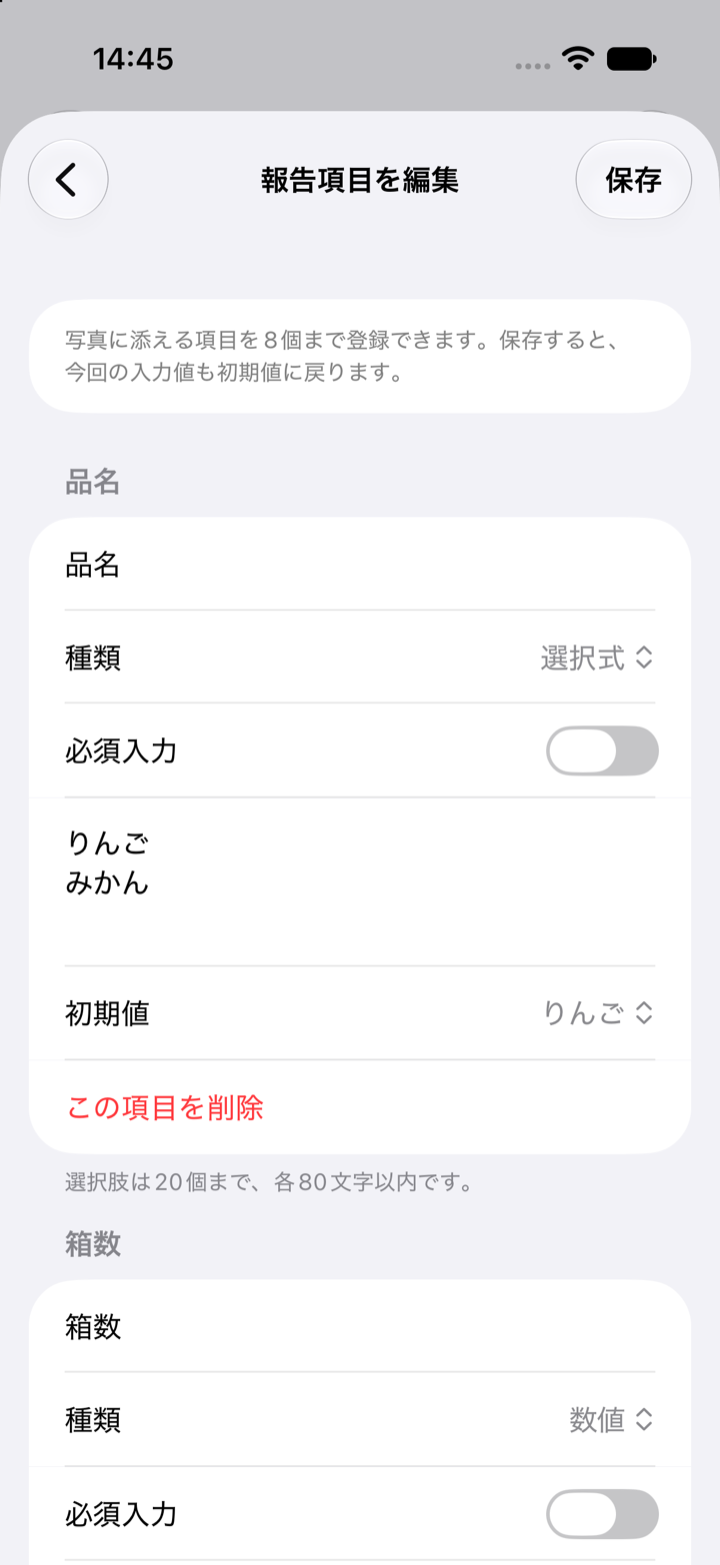
Open the report field editor in settings and choose Add field. Set a label and type: text, number, or select. You can also choose required input and a default value. Enter select options one per line. There are up to eight fields, labels up to 40 characters, and up to 20 select options. Fields imported by QR can be edited in the same screen.
Save or remove report fields
Save at the upper right to apply changes. Going back without saving discards edits. You can delete an individual field or all fields. Saving zero fields returns to reporting mainly with photos and comments. Saving a changed definition resets the current entered values to defaults, so check any existing input first. Past reports are unchanged.
4. Capture photos and fill in this report
Photograph the label or completed work. Enlarge the image to check small print. On the report screen, check your sender name, optional comment, and configured extra fields. Required fields need a value. Use numbers for numeric fields and the provided choices for select fields. Entering today’s values is different from editing the field definitions in settings.
5. Check the final destination and send email
Review the photos, sender name, contents, and actual recipient email address before choosing email sending. Even with a remembered address, check that today’s report is for the same person. For the first test, use a sample without personal information and ask the receiving office to confirm actual receipt.
6. Check status: acceptance is not delivery
“メール送信受付済み” means the service accepted the submission; it does not confirm delivery or reading. History retains the sent photos, recipient, report fields and entered values, and other report details. If human acknowledgement matters, use an agreed reply or phone process.
If the outcome is unknown, check acceptance first
When the report says its acceptance result needs checking, use the status-check action on the original report. Creating a new report and repeatedly sending the same photos can cause duplicates. Ask the recipient or support when the outcome remains unclear. For a confirmed failure marked as retryable, follow the guidance and retry from the original report.
Using LINE sharing or HTTPS POST
These are additional sending methods. Open the system sharing option, then select the person or group inside LINE or another destination app. It is not a fixed LINE-recipient button. Only configure an advanced HTTPS POST receiving URL when an administrator has supplied an endpoint for an existing system. Ordinary email sending needs no POST URL.
If setup or sending fails
For QR problems, check camera permission or use manual settings. If email sending is unavailable, check your sender name, recipient, connection settings, and required fields. Contact support@photoreportcamera.com with the report ID, device model, app version, and failed action. Do not post connection codes or photos containing personal information in public.